Our kids spoil our dogs. I came home and found Gus, the pug, taking a nap with a pillow and blanket on the beanbag chair.

We have many patterns available, and more are regularly added. Shop our online store now
Ingrid has developed several classes and lectures based on the quilts that she has created. Read more about them here
Ingrid is now offering professional long-arm quilting services. Check out the long-arm quilting services page for pricing and more info.
Our kids spoil our dogs. I came home and found Gus, the pug, taking a nap with a pillow and blanket on the beanbag chair.
I was able to take a machine quilting class taught by Cindy Needham. Her work is absolutely amazing. It was the first time that I had quilted on silk – and I love the texture that it gives.
She gave the class 2 really good lectures and between them we quilted. The class was to go until 3:30pm but I was on information overload! I was amazed at her class samples and handouts.
This is the sample I worked on. I will probably finish it and hang it out in the studio.


Here is what has been on the long-arm. I will give the story behind the quilt when it is done.


 This quilt was SO much fun to make! I love the “folk art – modern” feel of it. I am really liking the grey and mustard color combination.


I quilted it on the long-arm and for some reason had some tension issues. I changed everything I could think of and can to the conclusion that I need to only use bottom line in the bobbin. (If I use anything else, I have to constantly fiddle with the tension.)
It was really hard to get good pictures of the quilting – but I do love the design I did.
I really like the grey and black polka-dots on the back. The fabric washed up so nicely, it almost feels like flannel.

One of my favorite parts of this project was the “faux-piping” binding. I saw the idea on Pinterest and knew that I would have to try it out. I like that the binding is sewn on by machine – since baby quilts are used so much. The binding turned out MUCH wider than I like to use – so I will adjust the measurements the next time I do it this way. LOVE the pop of color and the black and white stripes.


Another baby quilt!
I have been having such fun making baby quilts.

I found a wonderful background fabric – white with black dots. It washed up so nice and soft. I planned out how many rows that I wanted and then pressed lines so that I did not have to keep measuring. I could not use my blue wash away marker since I would be ironing them down.
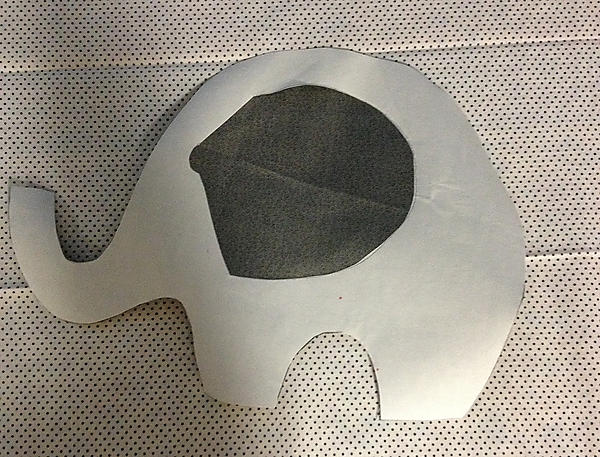

I traced the elephant shape onto fusible webbing. I cut the ears and eyes out of the webbing before pressing the fusible to the grey and yellow fabrics for the elephant bodies. I found all the grey and yellow elephant fabrics in my scrap bin. The eyes, I kept all black. The ear fabrics were all found in my scrap bin as well.

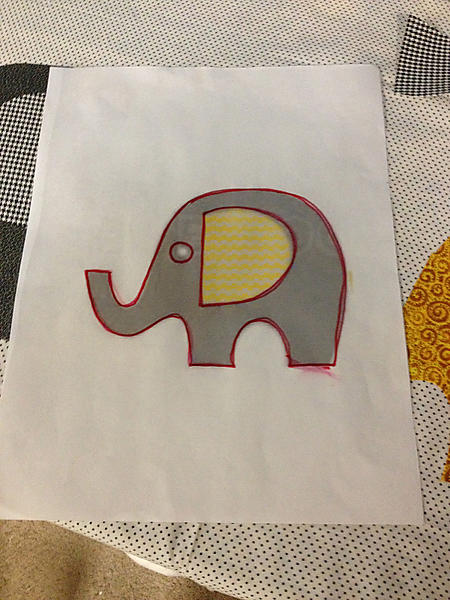
To make it easier to place the appliqué pieces, I traced the design with red marker onto transparency sheets. Wow! This worked great. It was easy to set the appliqué pieces facing right and left!


I used a grey thread for all of the machine appliqué. To stabilize the shape, I placed a piece of scrap paper behind the top. After finishing the satin stitch, I pulled the paper out.
Instead of doing a satin stitch around the eyes, I decided to just do a straight stitch and than a loop- to look like an eye.