I have compiled a simple picture tutorial of how I piece circles.
Gather supplies

There is a simple list of supplies that will be needed:
- Piecing template on plain white paper – this is used for reference
- Piecing template printed in reverse on freezer paper – this will be cut and used for tracing your shapes
- Paper scissors
- Fabric scissors
- 5 in squares – block background
- Theme fabrics for the circles – I am using a Tula Pink fat quarter bundle
- Crayola colored pencils – I am using the twist kind. Crayola works the best for me.
- Fine point pins
- Sandpaper – used to place under the fabric to aid in marking
Mark your template
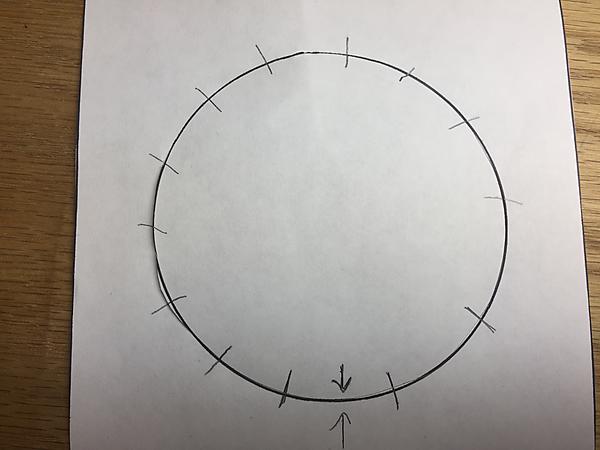
On the freezer paper template, Mark short straight lines through the black circle at about 1/2 inch increments. I also mark the center bottom of the circle with facing arrows or double lines to help me with picking the placement for my fabric and then lining the circle/block back up for piecing.
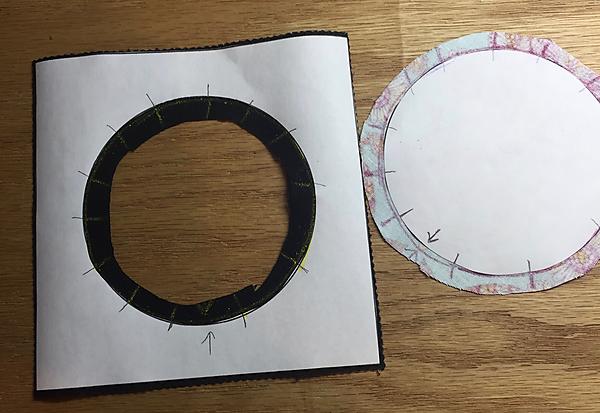
Cut out shapes and pick fabric

Cut the circle and block shape out of your freezer paper template. Do not cut all the way through the block shape to get to the circle, rather cut just the circle shape out.
Now it is time to pick your fabrics. I am using a pre-cut 5 inch stack for my blocks and a Tula Pink fat quarter bundle accented with solid fabric scraps for piecing my circles.
Place and Press


Your freezer paper templates are now going to be pressed (using a dry, hot iron) to the wrong side of the fabric. I love using the freezer paper because it is prepositional for several times if you are not happy with your initial placement of if you want to piece the same block several times.
Mark


Using your Crayola colored pencils, transfer all your marks to the fabric. You need to pick a color that you be able to see easily.
You are going to transfer the shape of your circles – which is now your sewing lines.
The short lines that were cut apart when you cut out the circle are where you will be pinning.
The facing arrows help you line up the circle to begin pinning.
Using a piece of sand-paper under your fabric helps a lot with marking.
Trim
After marking your fabric, it is time to trim. You are going to leave 1/4 inch around each shape – this is your seam allowance. This does not need to be a precise measurement. You need to have enough fabric to be able to piece, pin and that it will not fray, but too much of a seam allowance will make it difficult to piece and bulky.
Clip

There are some curve piecers that do not clip the seams but I do. I helps the process to be easier, more precise and in the end less ripping out. I clip only the blocks seam allowance. This is the pice that lays on top when pinning and piecing and needs to be eased. Clipping needs to be between the short marked lines and up close to but not through the seam line. You can always add some clips as you pin if you need more.
Here is some freezer paper that I found on amazon.
